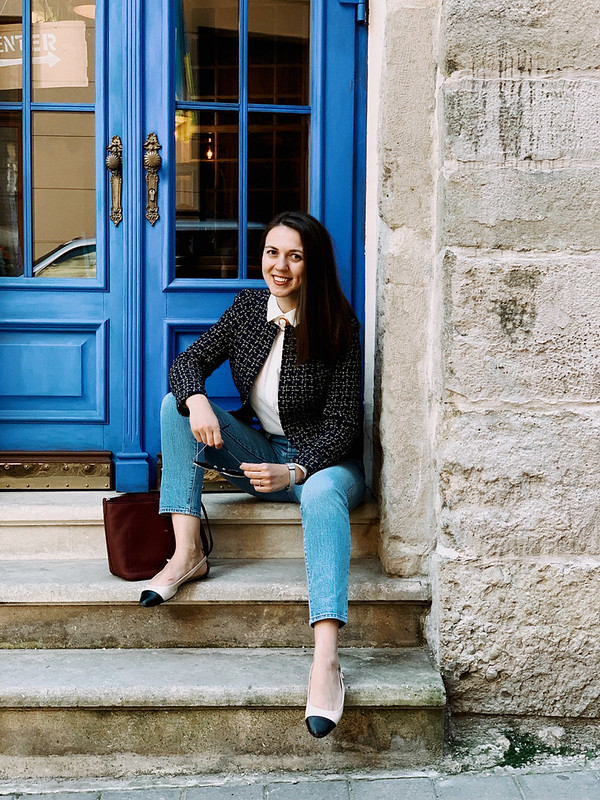
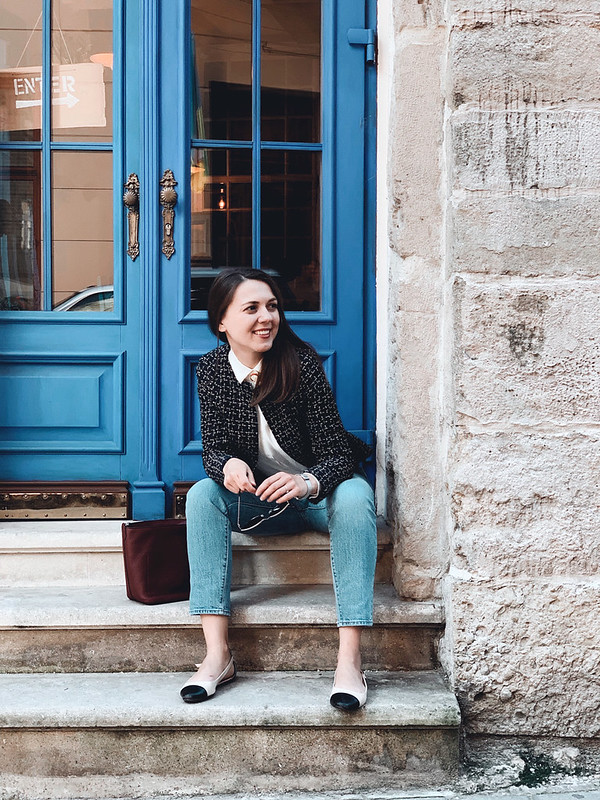
Halyna in her hometown of Lviv, Ukraine. Her instagram is @zigzagsewing
We debated about putting trim, or fringe, or even buttons but in the end decided on only simple patch pockets and no closures at all. After all with this type of jacket that fits like a cardigan I find you rarely button it up. So in this picture it is pinned closed (to show the plaid matching across the front) but in the end it had no snaps or buttons.

For the pattern I used this tried and true Vogue jacket pattern. It's the same pattern I used for my own jacket a few years ago, eek those pictures are goofy looking. And actually I rarely wear that jacket. I never seem to have quite the right shirt to wear with it. I'm sure this pattern is still available. Recently on IG I suggested that Vogue patterns reprint some of these older (excellent) patterns that they haven't discontinued with new cover art - they would probably attract attention again.

This fabric wants to unravel the minute you touch it with the scissors. I cut each piece single layer, just cut one out, mark the wrong side with a piece of blue painter's tape, then flip and cut the 2nd of the pair. Then lay it on the fabric, aligning the plaids, and cut the next adjoining piece. Until I go all around the jacket. With luck they should all match up 😉. I do start with the center front.


I do regret not block fusing the whole thing with lightweight interfacing before cutting out. That would have helped with the unraveling and just given this slightly delicate fabric some more strength. It wasn't intended to be a full-on hand stitched style French jacket - just the look of that style but a quicker version. This image above gives you the best view of the color, it's actually very much shades of dark blue and then that one gold weave.
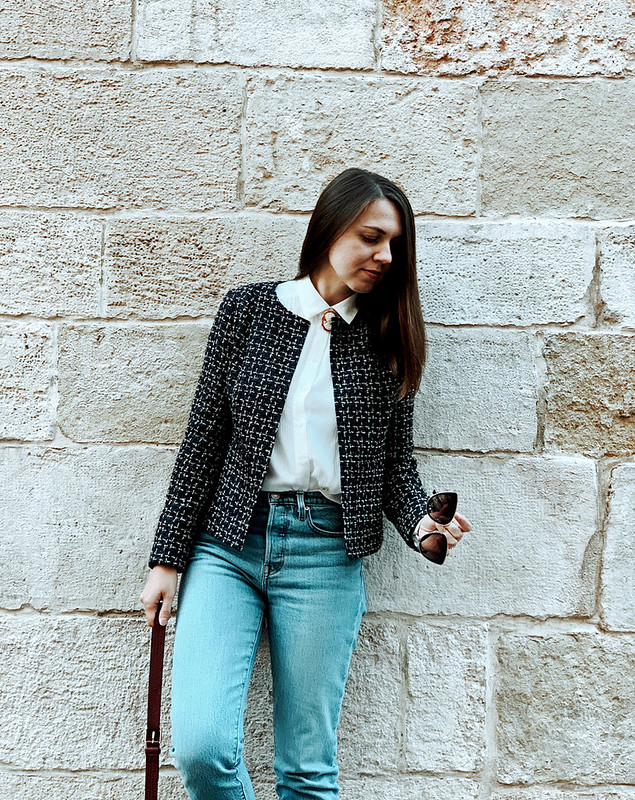
I really like it with the white shirt - will have to try that with my jacket.
A couple of views of the sleeve. This pattern is really amazing, if you follow the notches and horizontal markings when you cut out it really matches perfectly just about everywhere, including the sleeve.
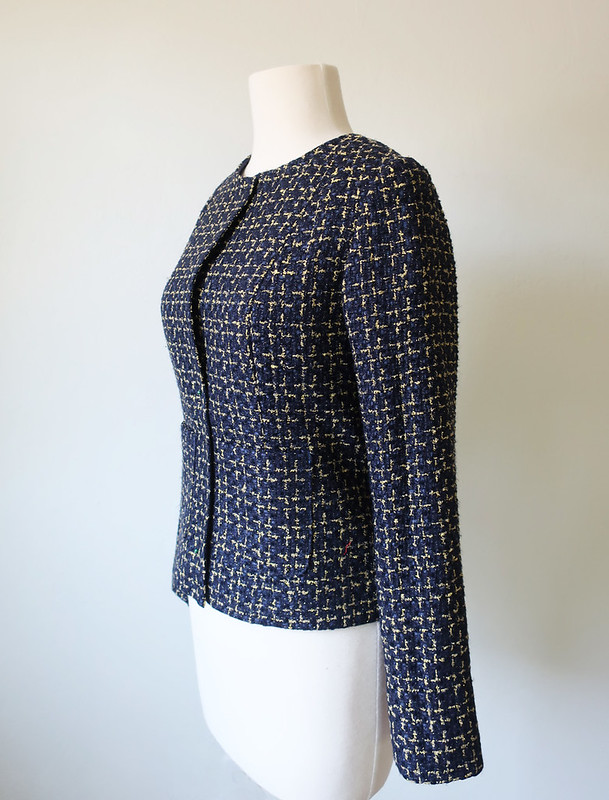

I think we took the sleeve in to be more narrow, have a more fitted look.
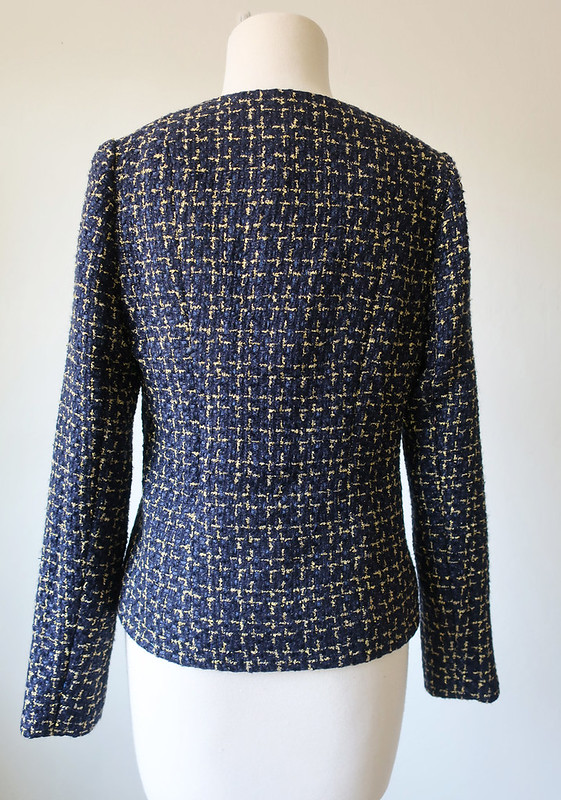
I also took it in a bit at the waist area in the back, which I think threw off my plaid there a tiny bit but I can live with it.
In fabric like this there is no point is cutting notches or triangles, they just disappear in the developing edge fringe - so I mark all notches and dots with a high-contrast thread tailor's tack.
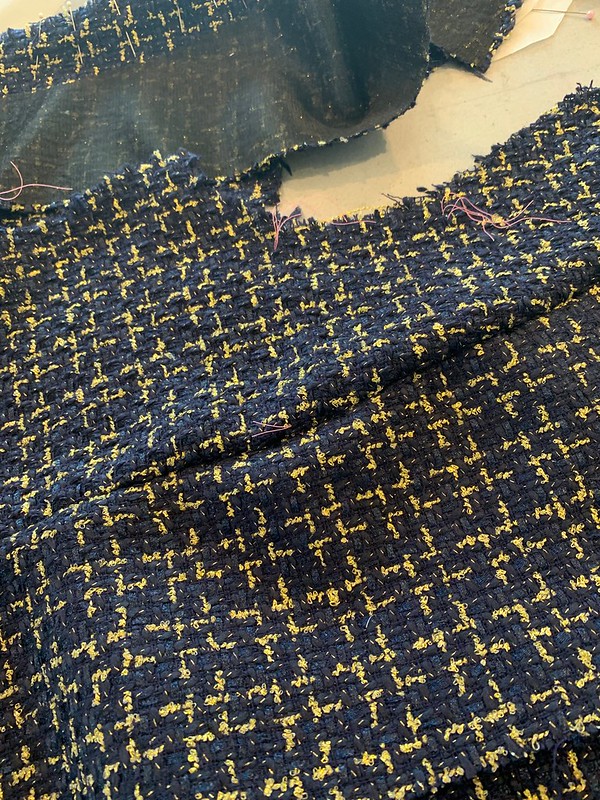
In the upper part of the photo above you can see the jacket front is interfaced, I think I used the lightweight weft interfacing, but I do wish I had fused all pieces with something. In any event, it was a bit too floppy at the center front, so I went back and put another layer of interfacing there, plus some black silk organza to give it more body. That was enough.
The lining is a navy blue bemberg rayon - my favorite interfacing that I use on most everything.
I machine sewed the lining up to the edge, no facings, and then turned, trimmed and pressed. I also understitched all around however the edged still wanted to curl a bit, I think all those various fibers that make up the boucle have a mind of their own, (not like a nice wool that presses when you want it to).
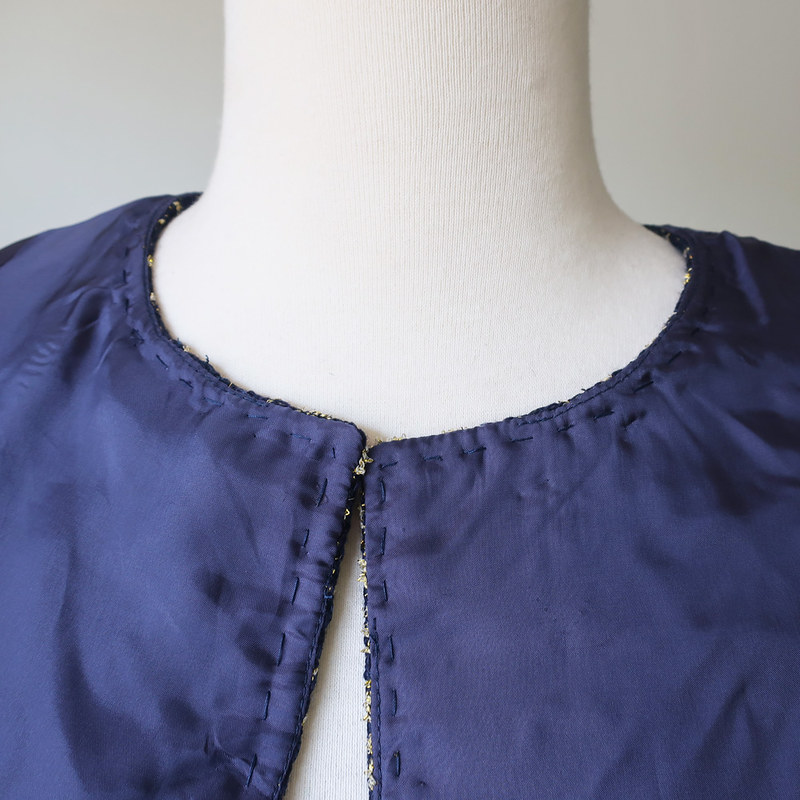
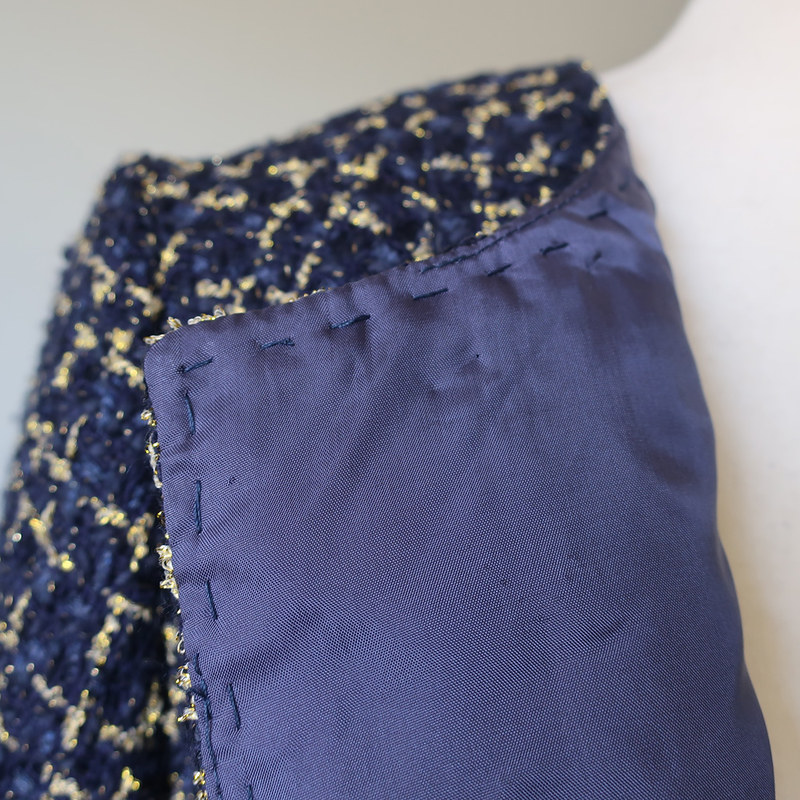
To counteract that problem I hand stitched inside with a running stitch that attached the lining to the seam allowances inside, about 1/4" from the edge and that was enough to keep everything flat.

So that's the latest on my unselfish sewing, which is not over! I am just about to make a new tunic top for my mom as she has a big birthday coming up and requested a new outfit for the party. Which is not until July so I have plenty of time.
I have sewed up all my various samples and examples for upcoming classes at Hello Stitch Studio and will start soon on the Jasika Blazer. There are just 2 spots left in that class which is Sept. 13-15. Although you can sew any jacket pattern that suits you - I'm going to show all kinds of sewing tips that apply to jacket sewing generally. Yesterday I finished a version of the Myosotis dress, that pattern is ideal for all kinds of hacks and can be really versatile (class is on July 14). All the classes can be found here.
Otherwise I've just finished a real pattern puzzle of a dress from the Burda April issue - that one had a LOT of stuff I want to make - just add them to my ever-growing list of summer wishes.
But now it's time to go for an evening swim - third day in a row that we are having triple-digit weather in my corner of the bay area.
Happy Sewing, Beth
This time of year there are so many flower photos to choose from, although things are looking a bit limp by around 7pm. Lots and lots of extra hand watering required. So stand there with the hose and daydream about all the patterns I want to make :)
And we have dahlias already! A benefit of living in a mile climate I guess, this one is already about 3 feet tall. Actually I usually take up the dahlia tubers in the fall, not because of the cold but because they tend to rot in the soil with the rain. Then I replant when see small sprouts growing on the tubers. But this one escaped me and actually started growing in late February so it had a head start on everything.


.jpg)
0 Yorumlar